
| 일 | 월 | 화 | 수 | 목 | 금 | 토 |
|---|---|---|---|---|---|---|
| 1 | 2 | 3 | 4 | 5 | 6 | |
| 7 | 8 | 9 | 10 | 11 | 12 | 13 |
| 14 | 15 | 16 | 17 | 18 | 19 | 20 |
| 21 | 22 | 23 | 24 | 25 | 26 | 27 |
| 28 | 29 | 30 |
- 컨테이너
- JPA
- mybatis
- Spring
- @Transactional
- CORS
- MSA
- kafka
- securitycontextholderfilter
- JWT
- 스프링 부트
- dockerhub
- Dead Letter Queue
- docker compose
- 서블릿 컨테이너
- 페이징
- 쿠버네티스
- Spring Container
- AWS
- JPQL
- redis
- @ComponentScan
- DLQ
- DI
- Routing Key
- Spring Data JPA
- docker
- JdbcTemplate
- Web
- 지연 로딩
- Today
- Total
look-forest
Junit 5 본문
Junit 의 구성
- Platform: 테스트를 실행해주는 런처 제공. TestEngine API 제공.
- Jupiter: TestEngine API 구현체로 JUnit 5를 제공.
- Vintage: JUnit 4와 3을 지원하는 TestEngine 구현체.

시작하기
기본 애노테이션
- @Test
- @BeforeAll / @AfterAll
- @BeforeEach / @AfterEach
- @Disabled
테스트 이름 표시
@DisplayNameGeneration
- Method와 Class 레퍼런스를 사용해서 테스트 이름을 표기하는 방법 설정.
- 기본 구현체로 ReplaceUnderscores 제공
@DisplayName
- 어떤 테스트인지 테스트 이름을 보다 쉽게 표현할 수 있는 방법을 제공하는 애노테이션.
- @DisplayNameGeneration 보다 우선 순위가 높다.
//전체 적용 : 메소드 명의 언더스코어를 공백으로 치환
@DisplayNameGeneration(DisplayNameGenerator.ReplaceUnderscores.class)
class InitTest {

    @Test
    @DisplayName("스터디 객체 만들기")
    void create_new_study() {
        Init study = new Init();
        assertNotNull(study);
        System.out.println("InitTest.create_new_study");
    }

    @Test
    @Disabled //깨지는 테스트에 활용
    void create_new_study_again() {
        System.out.println("InitTest.create_new_study_again");
    }

    //전체 테스트를 실행하기 전에 한번 실행
    @BeforeAll
    static void setUpBeforeClass() throws Exception {
        System.out.println("StudyTest.setUpBeforeClass");
    }

    //전체 테스트를 실행한 후에 한번 실행한다
    @AfterAll
    static void tearDownAfterClass() throws Exception {
        System.out.println("StudyTest.tearDownAfterClass");
    }

    //각각의 테스트를 실행하기 전에 실행
    @BeforeEach
    void setUp() throws Exception {
        System.out.println("StudyTest.setUp");
    }

    //각각의 테스트를 실행한 후에 실행
    @AfterEach
    void tearDown() throws Exception {
        System.out.println("StudyTest.tearDown");
    }

}
Assertion
JUnit이 제공하는 기능
org.junit.jupiter.api.Assertions.*
| 실제 값이 기대한 값과 같은지 확인 | assertEqulas(expected, actual) |
| 값이 null이 아닌지 확인 | assertNotNull(actual) |
| 다음 조건이 참(true)인지 확인 | assertTrue(boolean) |
| 모든 확인 구문 확인 | assertAll(executables...) |
| 예외 발생 확인 | assertThrows(expectedType, executable) |
| 특정 시간 안에 실행이 완료되는지 확인 | assertTimeout(duration, executable) |
마지막 매개변수로 실패 시 출력할 메세지 작성 가능. Supplier<String> 타입의 인스턴스를 람다 형태로 제공할 수 있다.
- 복잡한 메시지 생성해야 하는 경우 사용하면, lazy하게 실패한 경우에만 해당 메시지를 만들게 할 수 있다.
//마지막 인자 : 실패하면 메시지 출력. Supplier로 만들면 실패할 때 lazy하게 생성 가능
() -> assertEquals(StudyStatus.DRAFT, study.getStatus(), () -> "스터디를 처음 만들면 상태값이 " + StudyStatus.DRAFT + "여야 한다");
assertTrue(study.getLimitCount() > 0, () -> "스터디 최대 참석 인원은 0보다 커야 한다.");
assertAll을 쓰면 틀린 항목 모두 로그에 다 남겨준다. (원래는 앞에서 틀리면 멈춤)
Assertions 외 AssertJ, Hemcrest, Truth 등의 라이브러리를 사용할 수도 있다.
조건에 따라 테스트 실행하기
아래 기능을 사용하면, 특정 OS, 환경변수, JRE 등에 따라 테스트 실행 여부를 결정할 수 있다.
- org.junit.jupiter.api.Assumptions.*
- @Enabled___ 와 @Disabled___
- OnOS
- OnJre
- IfSystemProperty
- IfEnvironmentVariable
- If
태깅과 필터링
테스트 메소드에 @Tag 애노테이션을 붙여 그룹을 만들고 실행 시 필터링 할 수 있다.
@Test
@DisplayName("스터디 객체 만들기 fast")
@Tag("fast")
void create_new_study_fast() {
    System.out.println("금방 끝나니까 LOCAL에서 돌려도 된다");
}

@Test
@DisplayName("스터디 객체 만들기 slow")
@Tag("slow")
void create_new_study_slow() {
    System.out.println("오래걸리니까 LOCAL에서 돌리지 말고 CI 환경에서 돌리자");
}
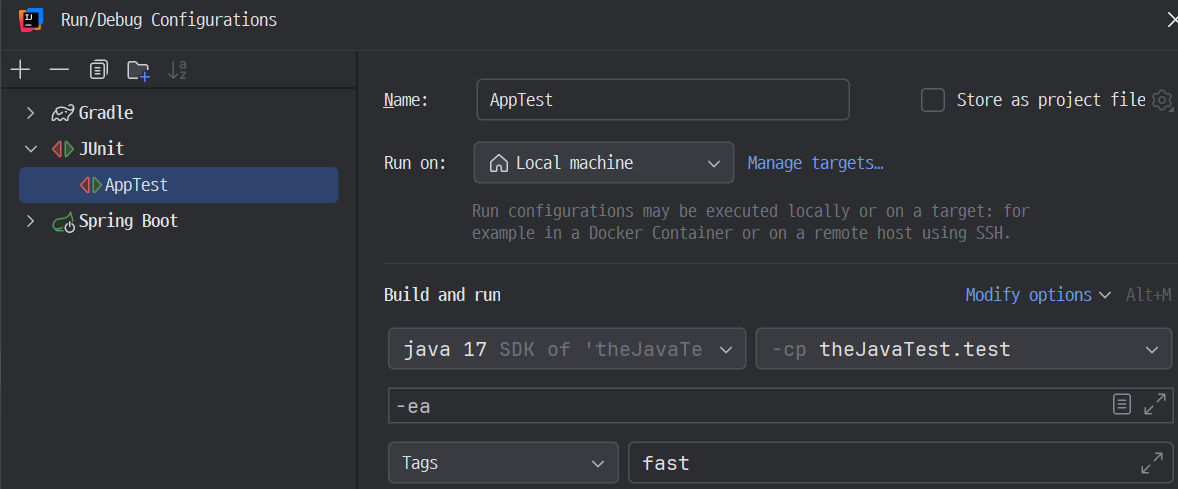
인텔리J에서 특정 태그로 테스트 필터링하도록 설정
커스텀 태그
JUnit 5 애노테이션을 조합하여 커스텀 태그를 만들 수 있다.
@Target(ElementType.METHOD)
@Retention(RetentionPolicy.RUNTIME)
@Test
@Tag("fast")
public @interface FastTest {
}
테스트 반복하기
@RepeatedTest
- 반복 횟수와 반복 테스트 이름을 설정할 수 있다.
- RepetitionInfo 타입의 인자를 받을 수 있다.
@RepeatedTest(value = 10, name = "맨 앞은 안되네 {displayName}, {currentRepetition}/{totalRepetitions}")
void repeatTest(RepetitionInfo repetitionInfo) {
    System.out.println("StudyTest.repeatTest " + repetitionInfo.getCurrentRepetition()
            + "/" + repetitionInfo.getTotalRepetitions());
}
@ParameterizedTest
- 테스트에 여러 다른 매개변수를 대입해가며 반복 실행한다.
@DisplayName("스터디 만들기")
@ParameterizedTest(name = "{index} {displayName}, message={0}}")
@NullAndEmptySource
@ValueSource(strings = {"날씨가", "많이", "추워지고", "있네요"})
void parameterizedTest(String message) {
    System.out.println("message = " + message);
}
인자 값들의 소스
- @ValueSource
- @NullSource, @EmptySource, @NullAndEmptySource ▷ null, empty 넣어줌
- @EnumSource
- @MethodSource
- @CsvSource ▷ CSV : Comma-Separated Values
- @CvsFileSource
- @ArgumentSource
@DisplayName("@MethodSource 테스트")
@Nested
class MethodSourceTest {

    @DisplayName("String::length 메서드가 문자열의 길이를 반환한다.")
    @ParameterizedTest(name = "length of \"{0}\" is {1}")
    @MethodSource("stringAndLengthProvider")
    void testWithStringProvider(String argument, long length) {
        assertEquals(length, argument.length());
    }

    static Stream<Arguments> stringAndLengthProvider() {
        return Stream.of(
            Arguments.of("apple", 5),
            Arguments.of("banana", 6)
        );
    }
}
※ 외부 패키지의 메소드를 참조하는 것도 가능
인자 값 타입 변환 - 파라미터로 객체를 받고 싶을 때
- 암묵적인 타입 변환
- 명시적인 타입 변환
- 인자가 하나 ▷ SimpleArgumentConverter 상속 받은 구현체 제공, @ConvertWith
- 인자가 여러개 ▷ ArgumentsAggregator 인터페이스 구현, @AggregateWith
@DisplayName("스터디 만들기")
@ParameterizedTest(name = "{index} {displayName}, study={0}}")
//    @NullAndEmptySource // Null, empty 값 추가
@ValueSource(ints = {10, 20, 30})
void parameterizedTest(@ConvertWith(StudyConverter.class) Study study) {
    System.out.println("study = " + study.getLimit());
}

static class StudyConverter extends SimpleArgumentConverter {
    @Override
    protected Study convert(Object source, Class<?> targetType) throws ArgumentConversionException {
        assertEquals(Study.class, targetType, () -> "Can only convert to Study");
        return new Study(Integer.parseInt(source.toString()));
    }
}

@DisplayName("스터디 만들기 CSV")
@ParameterizedTest(name = "{index} {displayName}, study={0}}")
@CsvSource({"10, '자바 스터디'", "20, 스프링"})
void parameterizedTestCsv(@AggregateWith(StudyAggregator.class) Study study) {
    System.out.println(study);
}

//제약 조건 : static class 여야 한다.
static class StudyAggregator implements ArgumentsAggregator {
    @Override
    public Object aggregateArguments(ArgumentsAccessor accessor, ParameterContext parameterContext) throws ArgumentsAggregationException {
        return new Study(accessor.getInteger(0), accessor.getString(1));
    }
}
테스트 인스턴스
JUnit은 기본적으로 테스트 메소드 마다 테스트 인스턴스를 새로 만든다.
테스트 메소드를 독립적으로 실행하여 예상치 못한 부작용을 방지하기 위함이다.
Junit5에서 인스턴스 생성 전략을 바꾸는 방법
@TestInstance(Lifecycle.PER_CLASS)
- 테스트 클래스당 인스턴스를 하나만 만들어 사용한다. (성능 상 이점)
- 경우에 따라, 테스트 간에 공유하는 모든 상태를 @BeforeEach 또는 @AfterEach에서 초기화 할 필요가 있다.
- @BeforeAll과 @AfterAll을 static이 아니라 인스턴스 메소드 또는 인터페이스 default 메소드로 정의할 수도 있다.
@Nested
- 테스트 클래스 안에 테스트 클래스를 넣을때
테스트 순서
기본적으로 테스트는 순서를 보장하지 않는다. (보통 순서대로 실행되긴 하지만)
유즈 테스트, 시나리오 테스트 등에서는 테스트 간 상태를 공유하고 의존성이 필요할 수도 있다.
이처럼 상태를 공유하고 특정 순서대로 테스트를 실행하고 싶은 경우엔
@TestInstance(Lifecycle.PER_CLASS)와 함께 @TestMethodOrder를 사용할 수 있다.
- 순서 설정을 위해 MethodOrderer 구현체를 설정한다.
기본 구현체 :- Alphanumeric
- OrderAnnoation
- Random
@TestInstance(TestInstance.Lifecycle.PER_CLASS) //상태 공유
@TestMethodOrder(MethodOrderer.OrderAnnotation.class) //순서
class StudyTest {

    int value = 0; //상태 공유를 위함

    @Order(1)
    void first() {
    	value ++;
    }

    @Order(2)
    void second() {
    	if(value == 1)
        	value--;
    }
}
JUnit 설정 : junit-platform.properties
JUnit 설정 파일로, 클래스패스 루트 (src/test/resources/)에 넣어두면 적용된다.

# 테스트 인스턴스 라이프사이클 설정
junit.jupiter.testinstance.lifecycle.default=per_class

# @Disabled 무시하고 실행하기
junit.jupiter.conditions.deactivate=org.junit.*DisabledCondition

# 테스트 이름 표기 전략 설정
junit.jupiter.displayname.generator.default=\
  org.junit.jupiter.api.DisplayNameGenerator$ReplaceUnderscores

# 확장팩 자동 감지 기능
junit.jupiter.extensions.autodetection.enabled=true
확장 모델
JUnit 4의 확장 모델은 @RunWith(Runner), TestRule, MethodRule.
JUnit 5의 확장 모델은 단 하나, Extension.
확장팩 등록 방법
- 선언적인 등록 @ExtendWith <- 객체가 아니라 클래스 단위라 테스트 별 설정 값 변경 불가
- 프로그래밍 등록 @RegisterExtension <- 객체 단위라 테스트 별 설정 값 변경 가능
- 자동 등록 자바 ServiceLoader 이용 <- 비추. 원치않는 Extension이 들어올 수 있으니 명시적으로 사용하자.
//@ExtendWith(FindSlowTestExtension.class)
class StudyTest {

    @RegisterExtension
    static FindSlowTestExtension findSlowTestExtension = new FindSlowTestExtension(1000L);
확장팩 만드는 방법
- 테스트 실행 조건
- 테스트 인스턴스 팩토리
- 테스트 인스턴스 후-처리기
- 테스트 매개변수 리졸버
- 테스트 라이프사이클 콜백
- 예외 처리
- ...
확장팩을 만들어 붙여보자
ExtensionContext를 통해 클래스명, 메소드명, 저장소를 가져올 수 있다.
public class FindSlowTestExtension implements BeforeTestExecutionCallback, AfterTestExecutionCallback {

    //    private static final long THRESHOLD = 1000L;
    private long THRESHOLD;

    public FindSlowTestExtension(long THRESHOLD) {
        this.THRESHOLD = THRESHOLD;
    }

    @Override
    public void beforeTestExecution(ExtensionContext extensionContext) throws Exception {
        ExtensionContext.Store store = getStore(extensionContext);
        store.put("START_TIME", System.currentTimeMillis());
    }

    @Override
    public void afterTestExecution(ExtensionContext extensionContext) throws Exception {
        SlowTest annotation = extensionContext.getRequiredTestMethod().getAnnotation(SlowTest.class);

        ExtensionContext.Store store = getStore(extensionContext);
        Long startTime = store.remove("START_TIME", long.class);
        long duration = System.currentTimeMillis() - startTime;
        if (duration > THRESHOLD && annotation == null) {
            System.out.printf("<<<Please consider mark method [%s] with @SlowTest>>>\n", extensionContext.getRequiredTestMethod().getName());
        }
    }

    private ExtensionContext.Store getStore(ExtensionContext extensionContext) {
        //ExtensionContext 에는 값들을 저장할 수 있는 store 가 있다.
        String testClassName = extensionContext.getRequiredTestClass().getName();
        String testMethodName = extensionContext.getRequiredTestMethod().getName();
        ExtensionContext.Store store = extensionContext.getStore(ExtensionContext.Namespace.create(testClassName, testMethodName));
        return store;
    }
}
JUnit 4 마이그레이션
junit-vintage-engine을 의존성으로 추가하면, JUnit 5의 junit-platform으로 JUnit 3과 4로 작성된 테스트를 실행할 수 있다.
변경 사항
| JUnit 4 | JUnit 5 |
| @Category(Class) | @Tag(String) |
| @RunWith, @Rule, @ClassRule | @ExtendWith, @RegisterExtension |
| @Ignore | @Disabled |
| @Before, @After, @BeforeClass, @AfterClass |
@BeforeEach, @AfterEach, @BeforeAll, @AfterAll |
※ @RunWith(SpringRunner.class)는 @ExtendWith({SpringExtension.class})로 바꿔야 하는데, @SpringBootTest에 포함되어 있다.
참고 자료 & 이미지 출처
더 자바, 애플리케이션을 테스트하는 다양한 방법 (백기선 님)
'Test > 애플리케이션을 테스트하는 다양한 방법' 카테고리의 다른 글
| Web MVC / Security / JPA 관련 test (0) | 2024.12.15 |
|---|---|
| Mockito (0) | 2024.11.10 |
| 테스트 - DB 연동 (0) | 2024.08.17 |
| 테스트의 종류 (0) | 2021.05.01 |

